Summary
Bill runs perform billing, invoicing and payment collection actions as well as execution of contract and accounts receivable terms (dunning rules). Bill runs can be triggered in either a manual 'one-off' fashion or using an automated recurring approach. The accounts that a bill run touches are determined by the bill groups that the accounts are under. Bill runs are associated with bill groups in order to bill accounts.
In this article we will cover how to setup and schedule a bill run that bills packages and generates an invoice.
For additional details on the fields presented on the bill runs screen see the Bill Runs screen help article.
Prerequisites
Currency exchange rates must be configured before bill runs can be setup
Bill groups need to be setup in order to specify which accounts a bill run will bill
Sample Configuration
Creating a New Bill Run
Log into the LogiSense Billing application
Click on the Setup menu, Finance and then Billing
Under the Bill Runs heading click the
 button to add a Bill Run
Under the Add Bill Run heading give the bill run a Name (e.g. 'Test BR'). In the example shown below the bill run has been set to to bill packages and generate an invoice on the billed accounts. Packages on accounts will only be billed in this example if their package ‘Next Bill Date’ falls between Sept 1st and Oct 1st (the Bill Period Start and Bill Period End dates shown in the image below)
To specify the accounts that the the bill run should bill it needs to be associated with one or more bill groups. In this example a bill group called ‘Test BG’ has been added to the bill run (shown in the image below)
Click Save to create the bill run
Scheduling a One-Time Bill Run
In the example below we will add a one time bill run to bill the accounts that are under a bill group.
Ensure you have setup a bill group under the Setup / Finance / Billing / Bill Group screen. The image below shows a bill group called ‘Test BG’ which has two accounts under it
Navigate to the bill runs screen and ensure you have a bill run setup (e.g. use the ‘Test BR’ created in the previous example)
Select the bill run and under the Edit Bill Run panel on the right click on the Schedule tab
To schedule a one time bill run click the
 icon next to Schedule tab
On the modal that appears specify when the bill run should occur (e.g. ‘Schedule Now’)
Click Add and then Save to add the one-time scheduled bill run
The bill run will now be listed on the Scheduled tab
Result
Setup / Finance / Billing / Bill Runs
When the scheduled bill run executes and finishes it will indicate when it started and completed on the Completed tab
Account / Billing / Invoices
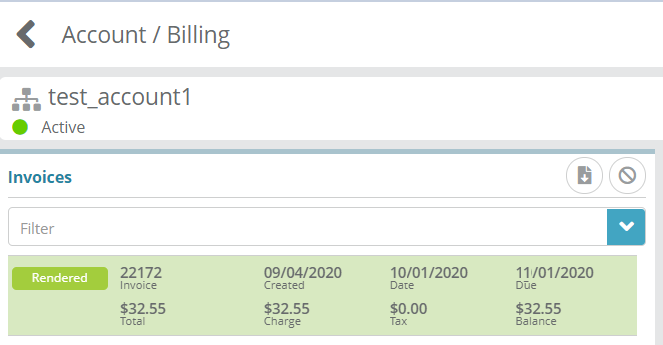
When accounts are setup and billed by the bill run as configured above an invoice will be generated for transactions on the account within the bill run’s billing period.
To see the invoice that is generated along with the with package (subscription) charges load an account under the bill group that the bill run billed and access the Invoices screen.
Next Steps
Optional: If you utilize General Ledger codes you can configure these now. See the General Ledger (GL) Code Configuration Example article for a configuration example
You have now configured the system to the point where the products you wish to sell can be setup. The first step is to setup service types which are used when configuring services. See the Service Type Configuration Example for an example of how to setup service types


