Summary
Role Groups allow you to define specific screen permissions that can be configured on roles in the LogiSense Billing application. For instance, you can setup a role group that can access specific account menu screens and another role group that can access certain setup menu screens and assign both role groups to a role. The role (e.g. ‘finance’) is then configured on a user to define that user’s permissions.
In this example we are going to create a ‘Billing’ group that will only have access to the billing options on accounts. This may be useful for users/groups that only need to initiate billing for an account and do not need access to the various other configuration options.
For additional details on the fields presented on the role groups screen see the Role Groups Screen screen help article.
Prerequisites
Role groups can be setup as needed, there are no prerequisite configuration steps
Process
Log into the LogiSense Billing application
Click on the Setup menu then Users & Accounts
Click on Users
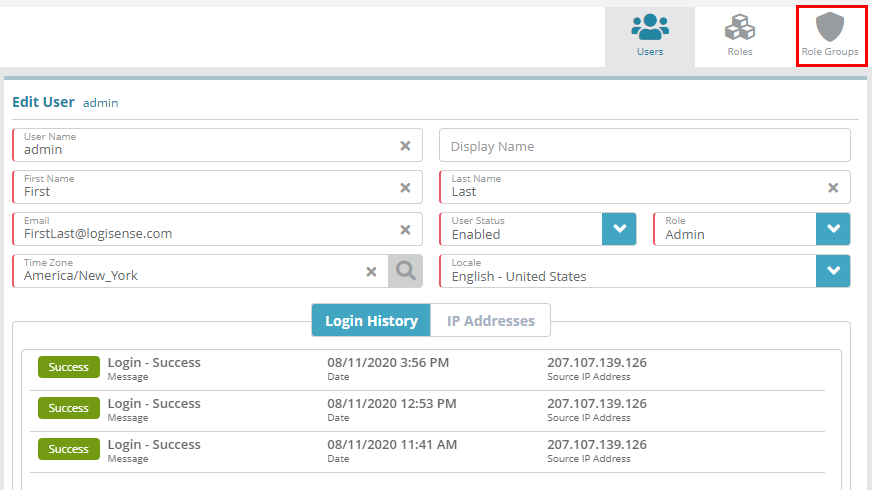
Click on Role Groups
Click on the
 icon to add a new role group
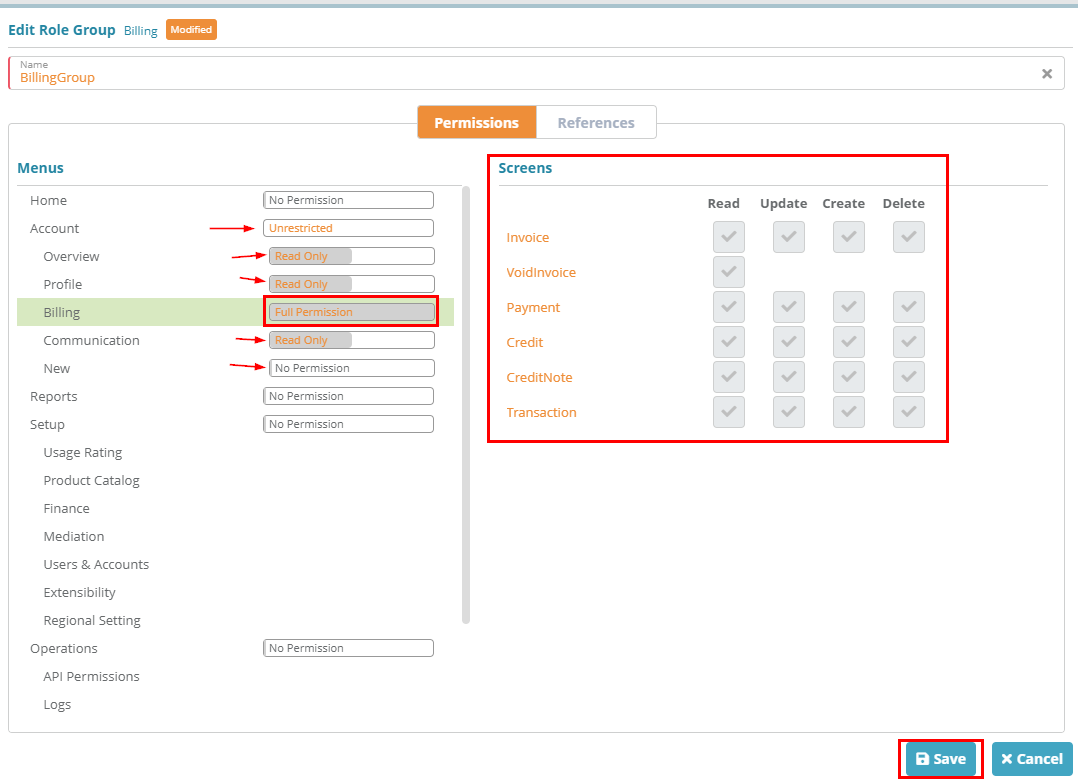
First enter ‘BillingGroup’ as the name then:
under the Menus section click No Permission beside Account until it shows as Unrestricted
next click Full Permission beside Overview until it changes to Read Only
follow the same steps to set Profile and Communication to Read Only
click on Full Permission beside New until it changes to No Permission
click on Billing and leave as Full Permission. On the Screens section you can see that this user will have full access to all billing screens
click on Save to save the role group
Next Steps
Once role groups are setup the permissions granted by the groups can be assigned to roles. See the Role Example article for details


