...
Guides in this article:
Okta Configuration Process
...
Access the Okta admin portal
Access the Application you setup for the LogiSense Billing integration
Click on the General link
Under the App Settings section click Edit
Check the option Enable SCIM provisioning
Click Save
Once the change is saved a new Provisioning link will appear under the application where SCIM settings can be populated
Click on Provisioning
On the Provisioning Settings page click Edit
In the SCIM connector base URL field enter the domain of your LogiSense Billing system followed by /ResourceServer/api/SCIM
In the Unique identifier field for users field enter your Okta supplied identifier
In the Supported provisioning actions section enable Push New Users, Push Profile Updates and Push Groups
Change the Authentication Mode to HTTP Header authentication
Under the HTTP Header section in the Bearer field paste the SCIM Access Token you copied earlier from the SAML Settings in the LogiSense Billing application
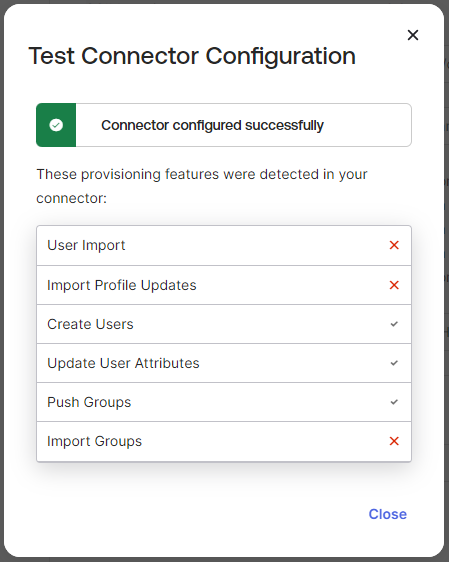
Click Test Connector Configuration
On the pop-up that appears the test should show that the testing of the create, update and push functions worked
Close the Test Connector Configuration pop-up and Click Save
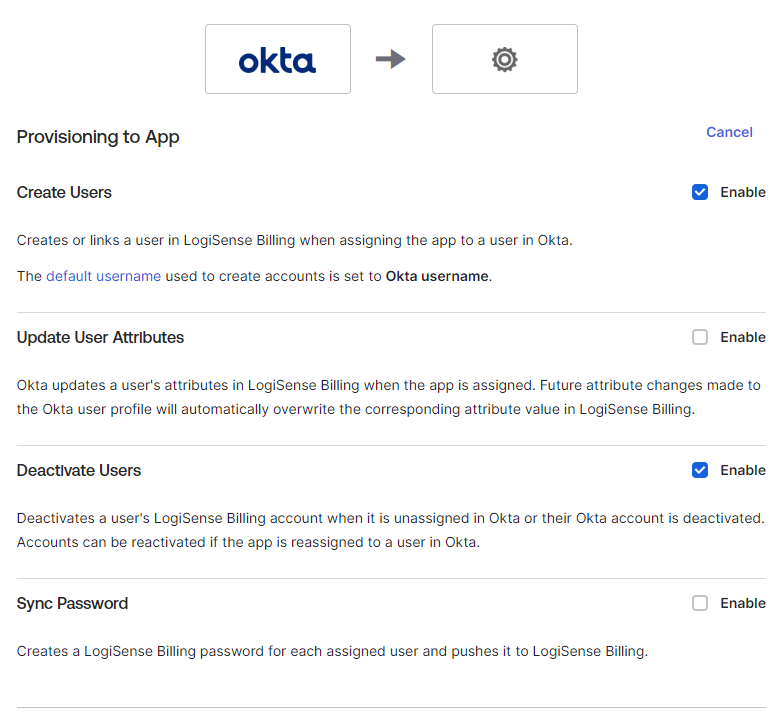
Next we need to grant Okta permissions in LogiSense Billing. On the Provisioning page click the Edit link
Next to Create Users click Enable
Next to Deactivate Users click Enable
Click Save
...


