Summary
This guide covers the process of adding a country and states/provinces in the LogiSense Billing application. Countries and states are used in the system to define location details on account contacts and companies.
For more information on regional settings and the information and settings on the regional settings screens see the content found under the Regional Settings article.
Contents
Prerequisites
Countries and states can be setup immediately, there are no prerequisite configuration steps.
Sample Configuration
Adding a Country
Log into the LogiSense Billing application
Click on the Setup menu then under Regional Setting click Countries
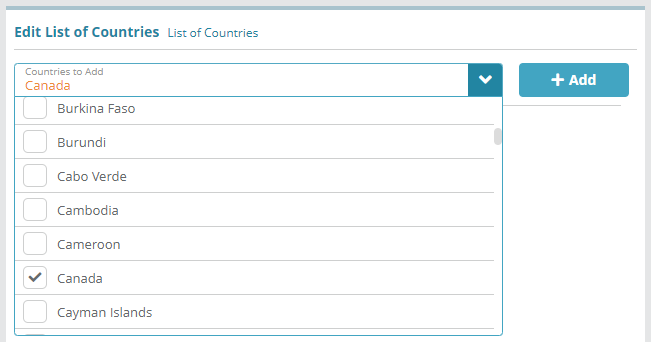
On the screen that loads click in the Countries to Add field and select the country or countries you wish to add. In this example we will add Canada
Click the + Add button and the country will be added in an un-saved state
Click Save to commit the changes and add the country
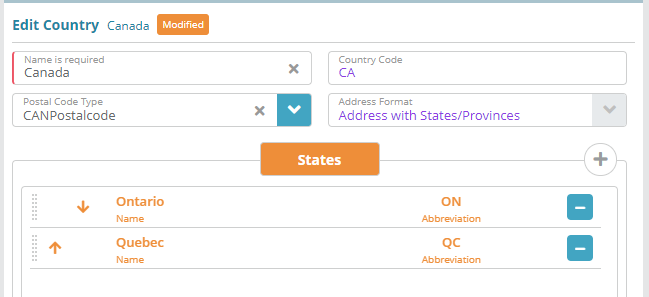
Click on the country in the list to view and define additional country details
Name: the name of the country (e.g. ‘Canada’)
Country Code: the two letter country code defined in ISO 3166 (e.g. ‘CA’)
Postal Code Type: enables postal code validation for either Canadian postal codes or U.S. zip codes
Address Format: indicates what address details are required when populating address details on an account contact/company
Adding a State/Province
After a country has been added you can add a state/province beneath it by doing the following:
Click on the Setup menu then under Regional Setting click Countries
Under the Country List select the country you wish to add a state/province to. In this case we will be selecting ‘Canada’
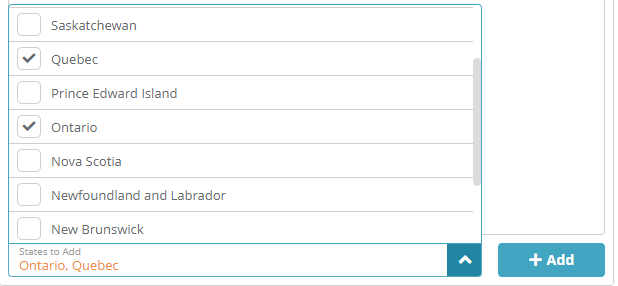
To add predefined states/provinces to the country click in the States to Add list at the bottom of the Edit Country panel. In this example we will add ‘Ontario’ and ‘Quebec’
Note: if the state/province you need to add is not in this list you can create a new state. See the Adding a New State/Province section below for instructions.
Click the + Add button to add the provinces to the country in an un-saved state
If desired, click the arrows or drag and drop the states to set the order that they will appear in within state lists
Click Save to commit the changes and add the states to the country
Adding a New State/Province
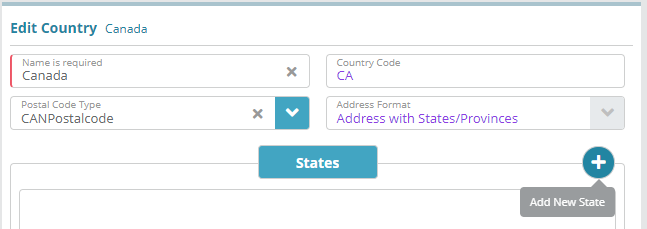
If the state/province you wish to add is not included in the system by default it can be added using the Add New State button next to the States tab. To do this follow the steps below:
Click on the Setup menu then under Regional Setting click Countries
Under the Country List select the country you wish to add a new state/province to
In the Edit Country panel next to the States tab click the
 button
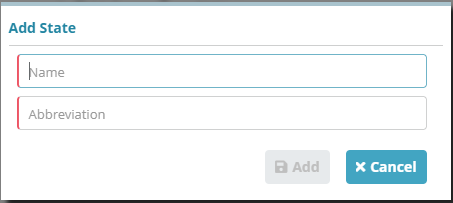
On the Add State modal that appears enter the state or province Name and two letter ISO 3166 Abbreviation
Click Add and then Save in the Edit Country panel to add the new state to the country
Result
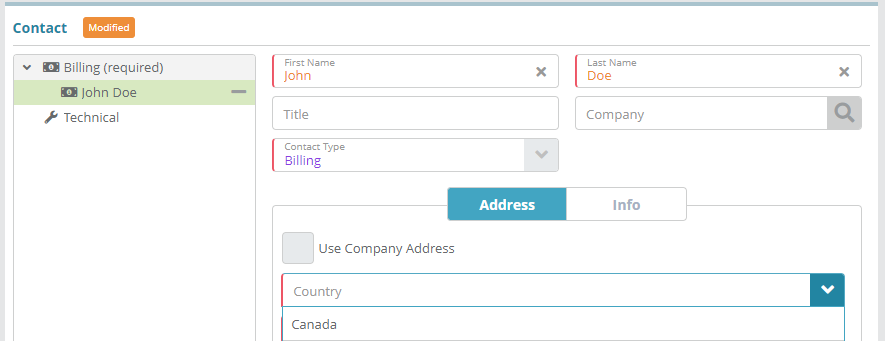
The country & state can now be added to system entities that contain address details, as shown below.
Account / New / Contacts
Setup / Users & Accounts / Company
Next Steps
Various settings under the Owner configuration must be reviewed and configured before moving on to other system configuration tasks. See the Owner Configuration Examples article for details.
Related Guides
<<documentation team task: link to API guide which covers the same config process>>
<<documentation team task: link to Data Import guide which covers the same config process>>

