Summary
Roles are assigned one or more role groups to determine the permissions that a role is granted. Once roles are set up they can be assigned to users in order to impart the needed permissions to that user. In this example we will create a role called “Billing” that will use the permissions we set for the “BillingGroup” Role Group in Configuring Role Groups.
For additional details on the fields presented on this screen see the Configure Roles guide.
Prerequisites
Configuring Role Groups must be completed in order to assign permissions to roles.
Process
Log into your Logisense Billing application
Click on the “Setup” menu then “Users & Accounts”
Click on “Users”
Click on “Roles”
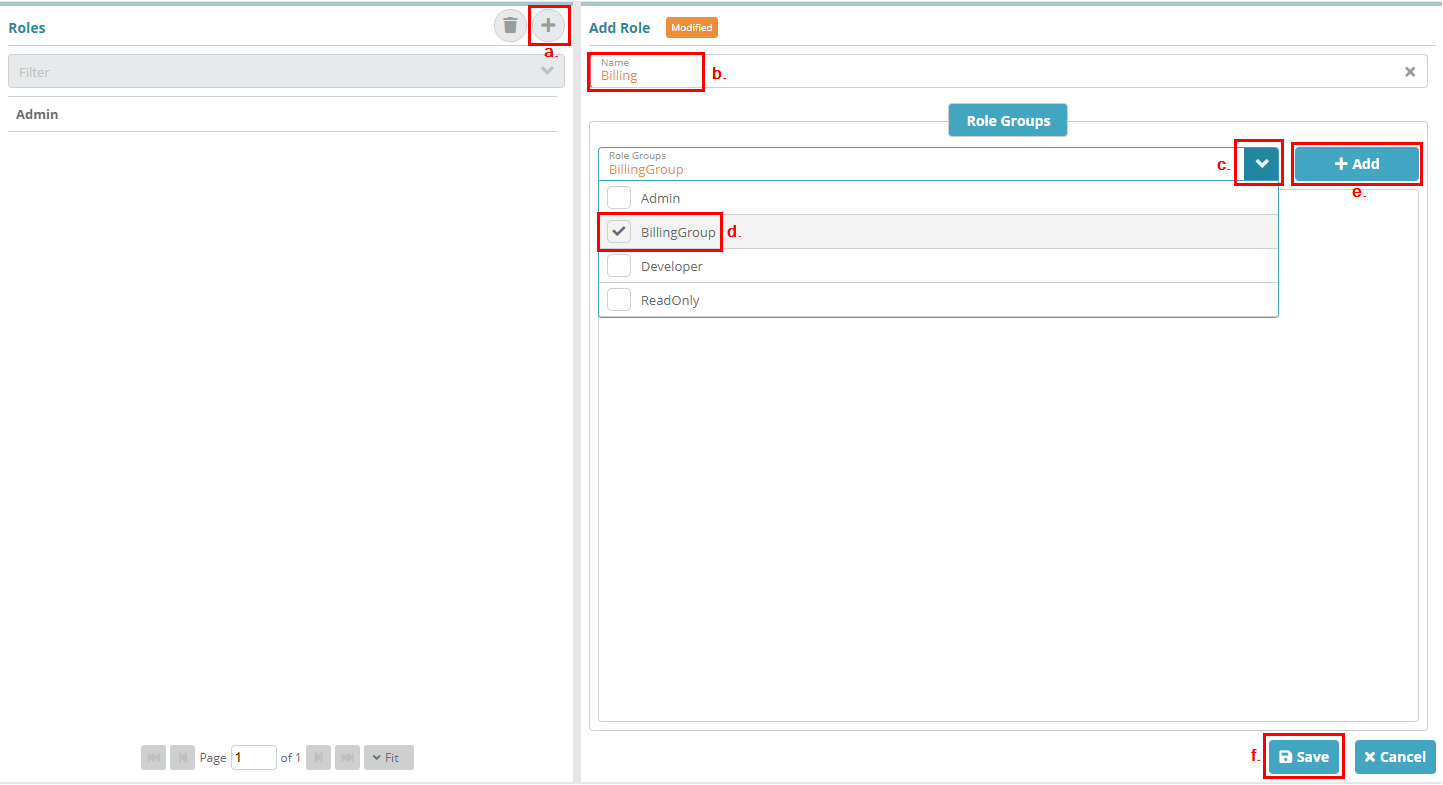
Perform the following steps to create a new role and assign it to the “BillingGroup” Role Group
Click the “+” icon to bring up the “Add Role” screen
Enter “Billing” as the “Name”
Click the drop down arrow to show the “Role Groups”
Select “BillingGroup”
Click on the “+ Add” button
Click on the “Save” button
Next Steps
Related Guides
<<documentation team task: link to API guide which covers the same config process>>
<<documentation team task: link to Data Import guide which covers the same config process>>


