Summary
In this example we will configure financial settings on an ownerOwner. We will set the financial year to start in February, add a new currency “Australian Dollar” ‘Australian Dollar’ and update the owner’s default currency to Australian dollars.For Dollars.
Note: it is important to configure financial settings before configuring other entities in the system as once entities using currencies have been configured (e.g. packages) the default currency cannot be changed and other currencies configured cannot be deleted.
If you require additional details on the fields presented on this screen see the Owner Configuration Screen screen help guide.
Contents
...
...
Prerequisites
Financial Settings can be setup immediately, there are no prerequisite configuration steps.
Sample Configuration
Setting the Fiscal Year Starting Month
Log into your LogiSense Billing application
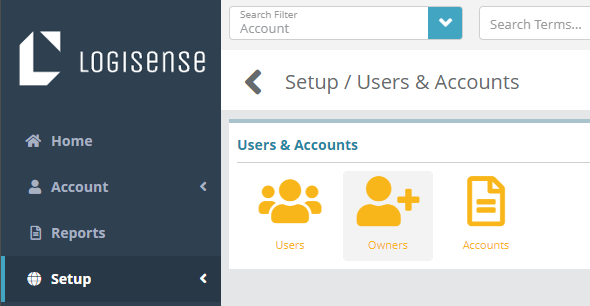
Click on the Setup menu, Users & Accounts and then click on User & Accounts
Click on Owners and the screen below will appear from which default owner settings can be configured for financial settings
Click Owners
On the Owner Configuration screen under Fiscal Setting click on the Fiscal Year Starting Month field to specify when the fiscal year will start for this owner (the fiscal year factors into reporting and revenue recognition)
In this example the fiscal year has been set to February. It will display in orange to indicate that unsaved changes have been made
Click Save to commit the changes and set the owners fiscal year to start in Februaryon the month specified
Adding Currencies
Load the Owners screen
Under Financial Settings section under the Currencies tab click into the Currency field to select currencies to add to the owner
Select a currency (e.g. Australian Dollar) and then click the + Add button
The Australian Dollar will now appear as an unsaved change in the owner’s list of currencies
Click Save at the bottom of screen and the following prompt will appear alerting you that other entities may require updates
Click Yes to accept the change
Editing Currencies
Load the Owners screen
Under Financial Settings section under the Currencies tab locate the currency you wish to edit
To edit the currency, click on edit icon (
 ) next to the currency and the Edit Currency modal will load. From here you can modify the currency as needed. For example, the Australian Dollar can be made to be the ‘Default’ currency for the owner as shown in the image below
After you have finished making changes click on Update and then Save to commit the changes to the currency
Removing Currencies
You cannot delete the default currency on an owner. If you need to delete the current default currency you will need to set another currency to be the default currency for the owner first.
Remove currency
Load the Owners screen
Under Financial Settings section under the Currencies tab locate the currency you wish to delete
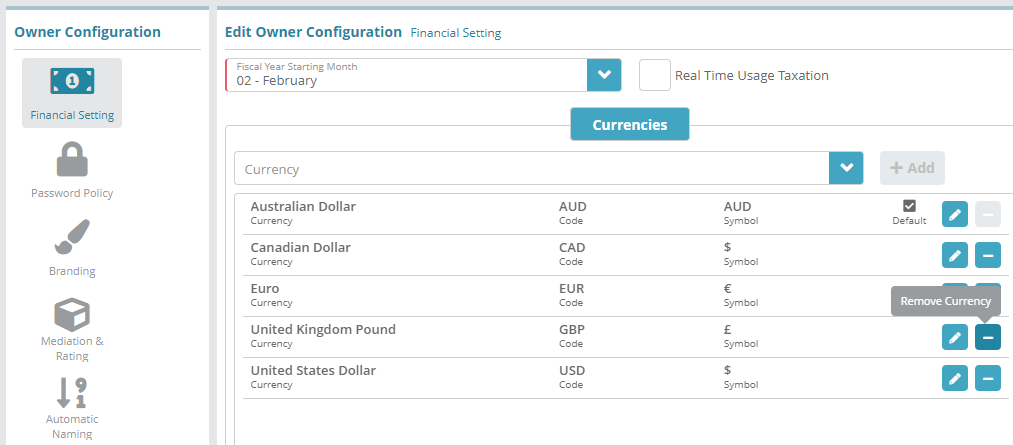
To remove a currency e.g. “Australian Dollar”‘United Kingdom Pound’, click on the
 button next to the currency and then the
  button to mark the currency for deletion
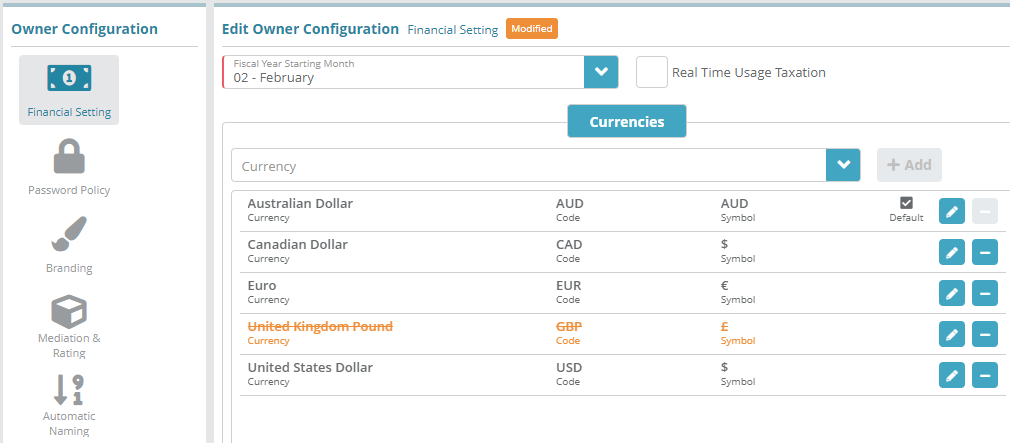
The currency will now be marked for deletion, to remove it click the Save button at the bottom of the screen
Result
<<demonstrate that the configuration setup above is now functional (e.g. can be added to other screens)>>
Next Steps
<<documentation team task: link to next configuration article>>
Related Guides
<<documentation team task: link to API guide which covers the same config process>>
<<documentation team task: link to Data Import guide which covers the same config process>>Reports that are filtered to display data based on the financial period will observe the new fiscal year configuration.
Setup / Extensibility / Reports
...
Next Steps
Owner Configuration Optional Steps:
Optional: Password policy settings can be updated to reflect your organizations policy now or at a later time. See the Password Policy Example article for information on modifying the default password policy configuration
Optional: Branding the UI with your company logos can be performed next, see the Branding Example article for instructions. This step is not an essential base configuration step and can be performed at a later time if desired
Optional: you can define custom invoice and credit note numbering schemes if desired. See the Automatic Naming Example article for instructions
Optional: if you need to translate product names on invoices you can configure translations on locales now or at a later time. See the Locales Configuration Example for a sample configuration
Optional: if you wish to define custom payment types you can do so now or at a later date. See the Payment Types Configuration Example for instructions on how to add a payment type
Optional: if you need to integrate the LogiSense Billing application with an external payment gateway you can do so now or at a later time. See the Payment Gateway Example for instructions on how to configure a gateway
SMTP Settings Optional Steps:
Optional: SMTP settings allow the system to send emails. New users cannot be emailed with a link to setup their passwords until SMTP settings are configured. This step does not need to be completed until you are ready to setup new users. See the SMTP Settings Configuration Example for instructions on how to setup and test SMTP Settings
Users and Roles Optional Steps:
Optional: Users and roles define who can access the system and what they can access. See the Role Group Configuration Example article as a starting point for setting up users and roles
Account Settings Required Steps:
Account types, statuses and contacts need to be configured before proceeding to other required steps. See the Account Types Configuration Example article to start setting up the required account settings


