Summary
Contact types are setup in order to configure certain types of contacts on accounts (a billing contact, administrative contact, site contact, etc.). Contact types contain contact points which are configured to store contact related data (email addresses, physical addresses, phone numbers, text, etc.). Once a contact type is setup you will be able to add it to an account during account creation or add it to existing accounts (on the Account > / Communication > / Contacts screen).
In this example we will add a secondary shipping contact which will require than an that its physical address is populated when the contact is added to an account.
For additional details on the fields presented on the contact types screen see the the Contact Types Screen screen help article.
Prerequisites
Contact types can be setup immediately, there are no prerequisite configuration steps
Sample Configuration
Adding a Contact Type
Log into the LogiSense Billing application
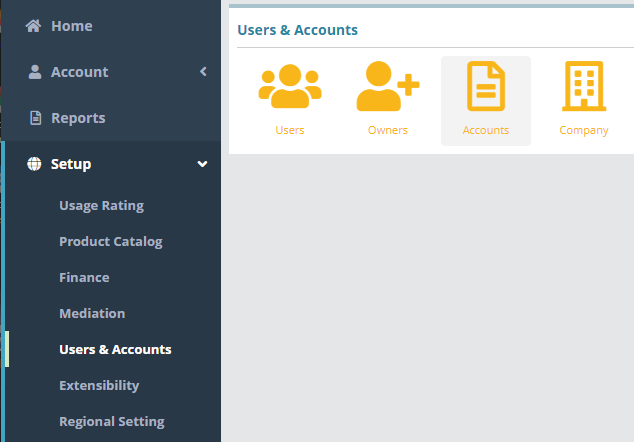
Click on the Setup menu, Users & Accounts and then Accounts
On the Contact Types screen under the Contact Types section click the
 button to add a contact type
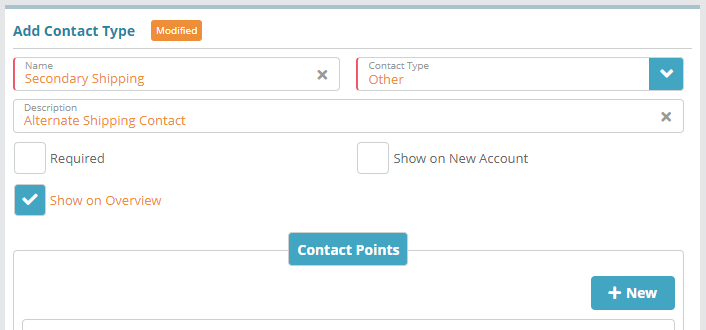
Under the Add Contact Type heading on the right specify the contact type details
Name: ‘Secondary Shipping’
Contact Type: ‘Other’ (as this is not a Billing or Service contact)
Description: optional additional detail
Required: unchecked. This setting determines if the contact must be setup when creating a new account. In this case configuration example a secondary shipping contact is setup as an optionoptional contact, not a required contact
Show on New Account: unchecked. Determines if the contact type fields will be displayed on the contacts screen when creating a new account
Show on Overview: enabled. If the secondary shipping contact is setup on an account then the contact details will appear on the Account / Overview screen
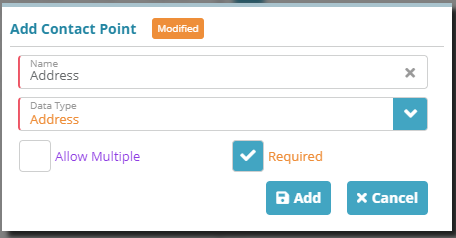
Under the Contact Points tab click the + New button to load the Add Contact Point modal and configure an address contact point on the contact
Name: enter a name e.g. ‘Address’ or ‘Shipping Address’
Data Type: specify that the contact point data should follow an address format
Allow Multiple: enable this if you want to be able to add multiple contact points of this type (i.e. add multiple addresses on the contact)
Required: set this so that the secondary shipping contact is required to have an address configured on the contact
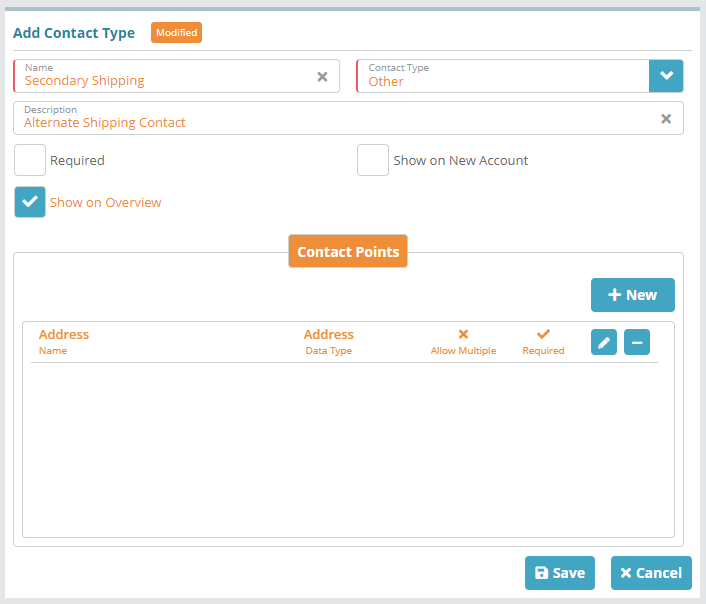
Click Add to add the contact point. If you wish to configure and require more contact points you can repeat the process above (e.g. add a phone number as a contact point for the secondary shipping contact)
The contact configuration can now be saved. Click Save to commit the changes
Result
Account / Communications / Contacts / Add Contact
...
As per the contact point configuration, the contact type cannot be added to saved on the account unless an address is supplied. The image below shows the results of attempting to save a secondary shipping contact on an account without entering address details.
...
Next Steps
A currency exchange must be configured as an exchange is required when setting up a bill run. See the Currency Exchange Configuration Example overview page for links to currency exchange configuration examples article


