...
...
Summary
The Credits screen gives you the ability to issue credits to an account should they be needed. In this example we are going to add a credit and then manually disburse to an existing invoice.
For additional details on the fields presented on the Credits screen see the Account Credits guide.
Prerequisites
You can issue credits once you have an account set up.
Sample Configuration
Log into your Logisense the LogiSense Billing application
In the search area at the top of the page, set the Search Filter to Account and then enter the name of the account you want to issue a credit to cancel. Select it from the list and then click the arrow button to go to the accounts overview page
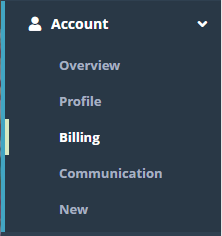
Under the Account menu, click on Billing then on the Credits icon
Click the
 icon to add a new Credit
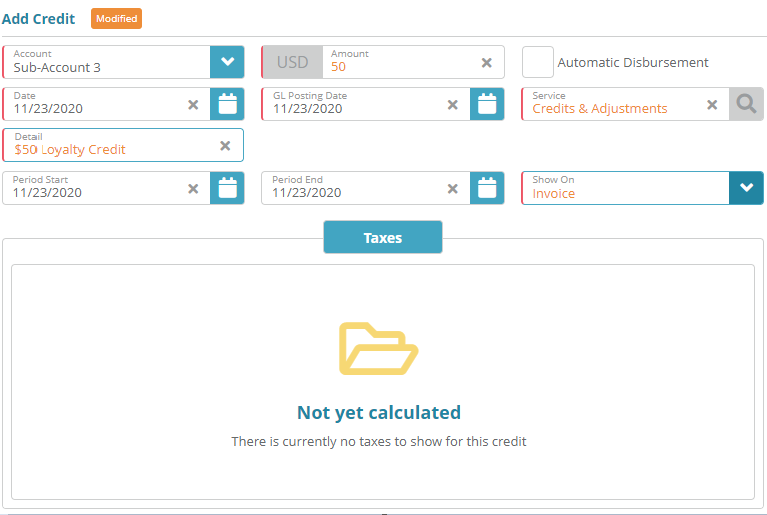
Fill out the required fields (marked with the red left border), and then click the Save button.
In this example we will be manually disbursing the credit, so the ‘Automatic Disbursement’ option is not selected
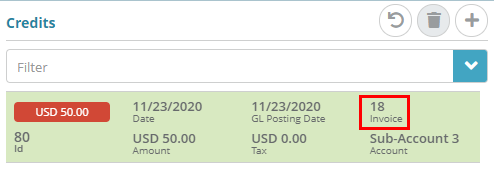
Your new credit will now show in the Credits list. If you want need to delete the a credit, you can select it from the list and click the
 icon. You can only delete credits that have not been issued (attached to an invoice which is done after billing the account).
The next time the account is billed the credit will be issued to the new invoice. Notice In the image below the Invoice is now set to 18 referenced on the credit (invoice number 18) after billing has completed
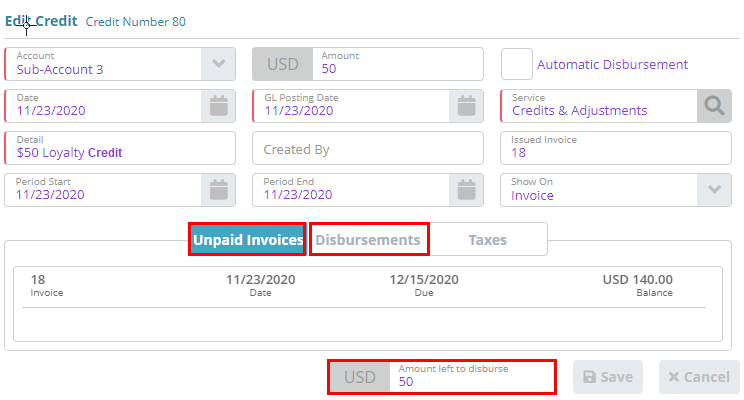
Now you can disburse the credit. Click on the credit in the credit list. Notice At this time the Unpaid Invoices, and Disbursement tabs are now will be available. Also notice at the bottom the Amount left to disburse is currently at 50.
indicated
Click on the invoice in the Unpaid Invoices tab that you want to disburse the credit to. In the Disbursement Amount enter the amount you want to disburse to the invoice. Since the account in this example only has the 1 invoice we will disburse the entire $50 credit to it and click the Save button.
Result
...
If you
...
click on the Disbursements tab and you will see the $50 credit is now disbursed to invoice 18 and that the Amount left to disburse is
...
0.
...
...
Loading the Invoices screen under the account and looking at invoice 18, you can see the total charge is $140 but the balance is $50 lower at $90
...
due to the credit.
...
Lastly, if you need to reverse a credit after the bill run has attached it to an invoice, you can use the ![]() button on the Credits screen. On the Confirm Reversal screen, click the Reverse button. The reversal will be applied the next time the account is billed resulting in a Reversed Credit transaction on the new invoice which will increase the invoice balance by the amount listed ($50 in this example).
button on the Credits screen. On the Confirm Reversal screen, click the Reverse button. The reversal will be applied the next time the account is billed resulting in a Reversed Credit transaction on the new invoice which will increase the invoice balance by the amount listed ($50 in this example).
...
Result
<<demonstrate that the configuration setup above is now functional (e.g. can be added to other screens)>>
Next Steps
<<documentation team task: link to next configuration article>>
Related Guides
<<documentation team task: link to API guide which covers the same config process>>
<<documentation team task: link to Data Import guide which covers the same config process>>


