Summary
Payment types are the methods that an account can use to make payments. This guide will provide an example on how to add a 'Check' custom offline payment type in the LogiSense Billing application.
...
Payment types that go through a payment gateway are added automatically when the payment gateway is configured, you do not need to configure these online payment types. See the Payment Gateway Configuration Example for instructions on how to configure a gateway.
Prerequisites
Payment types can be setup immediately, there are no prerequisite configuration steps
Configuration Steps
Log into the LogiSense Billing Application
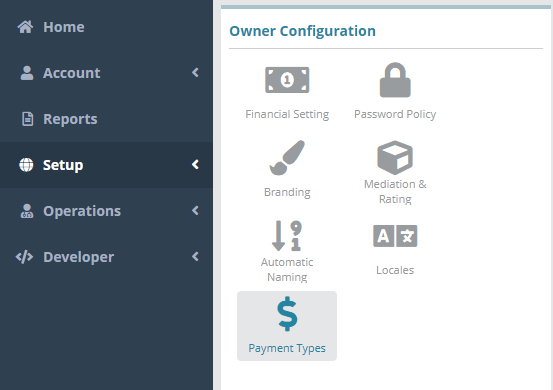
Navigate to Setup / Users & Accounts / Owner / Configuration
Select the Payment Types option on the left
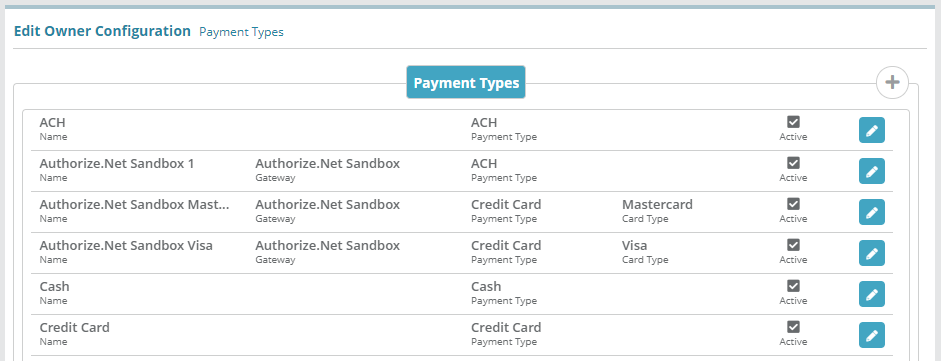
In the Edit Owner Configuration Payment Types section click the
 to the right of the Payment Types tab
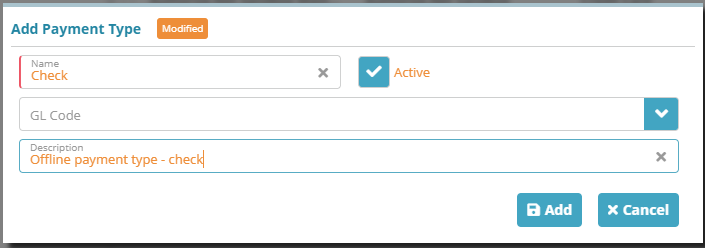
On the Add Payment Type modal that loads give the payment type a Name, and enable itthe Active checkbox. Optionally you can assign a GL Code to the type and a descriptionDescription
Click Add on the Add Payment Type modal and the payment type will be staged for addition (listed in orange with the other payment types)
Click Save and the Check payment type will be added as an active payment type of Payment Type ‘Cash’
Result
The custom payment type ‘Check’ can now be used to record a payment on an account.
Account / Billing / Payment screen
...
Next Steps
Owner Configuration Optional Steps:
Optional: if you need to integrate the LogiSense Billing application with an external payment gateway you can do so now or at a later time. See the Payment Gateway
Example for instructions on how to configure a gateway
SMTP Settings Optional Steps:
Optional: SMTP settings allow the system to send emails. New users cannot be emailed with a link to setup their passwords until SMTP settings are configured. This step
does not need to be completed until you are ready to setup new users. See the SMTP Settings Configuration Example for instructions on how to setup and test SMTP Settings
Users and Roles Optional Steps:
Optional: Users and roles define who can access the system and what they can access. See the Role Group Configuration Example article as a starting point for setting up users and roles
Account Settings Required Steps:
Account types, statuses and contacts need to be configured before proceeding to other required steps. See the Account Types Configuration Example article to start setting up the required account settings


