Summary
Account status types allow you to define what statuses an account can be in (Pre-Active, Active, Suspended, etc.). When creating account status types you select one of four back-end statuses which will determine if the account status type is billable and if the can set the status type to be billable or non-billable as well as specifying if an account can be modified while it is in the status you have created. The behavior of the back-end statuses is explained in more detail below.
In this example an Account Status Type of ‘PreActive’ will be created which will be set as ‘Non-Billable' with the ‘Prevent Changes’ setting disabled. When set this status will not bill recurring charges on the account and will permit changes to be made to the account (e.g. packages can be added to the account, account and account-package settings can be modified).
For additional details on the fields presented on this the account status types screen see the the Account Status Types guideScreen screen help article.
Prerequisites
...
N/A
Process
1. Log into your Logisense Billing application
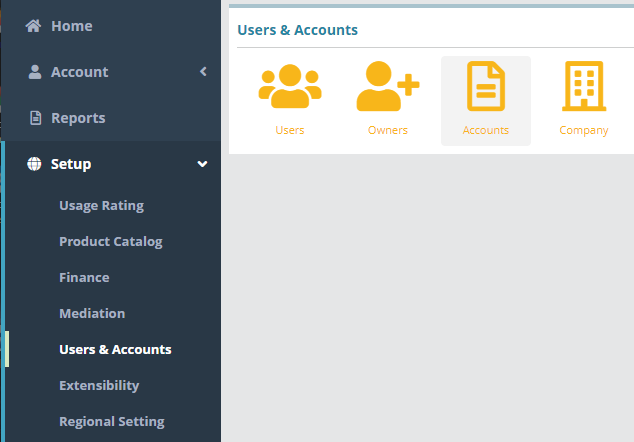
2. Click on the “Setup” menu then Users and Accounts. Then click on Accounts.
...
3. Under Accounts settings, Click on Status Types
...
Add an Account Status Type
...
Under the Account Status Types heading, click the '+' icon
...
Account status types can be setup immediately, there are no prerequisite configuration steps
Sample Configuration
Adding an Account Status Type
Log into the LogiSense Billing application
Click on the Setup menu, Users & Accounts and then Accounts
Under Accounts click on the Status Types tab in the upper right
Under the Account Status Types heading, click the
 icon to add a new account status type
In the Add Account Status Type section populate the settings as follows:
Name ‘PreActive’
Default enabled (automatically selects this status on the Add New Account screen)
Status as ‘Non-Billable’ (so that recurring charges aren’t applied to the account while in the PreActive status)
Prevent Changes unchecked (so that the account can be modified while in the PreActive status)
Click Save to add the account status type.
Result
Once saved,
...
the PreActive status
...
will be
...
Delete an Account Type
Under the Account Status Types heading, select the account status type you wish to delete. For e.g. Account Status Type : “test” is selected to be deleted as shown in the image below
Under the same Account Status Types heading click the below delete icon
On the confirmation dialog that appears select Yes. Selected Account Status Type will be deleted.
Next Steps
<<documentation team task: link to next configuration article>>
Related Guides
<<documentation team task: link to API guide which covers the same config process>>
<<documentation team task: link to Data Import guide which covers the same config process>>the default value in the Status field when adding a new account.
Account / New
...
Next Steps
Contact Types Optional Configuration:
Optional: Once account status types are configured you can define the contact types that accounts can contain. See the Contact Types Configuration Example for an example of how to setup a contact type
Currency Exchange Required Settings:
A currency exchange must be configured as an exchange is required when setting up a bill run. See the Currency Exchange Configuration Example article


