Summary
In this example we will bill the sub-account we created in Creating a Sub-Account using the package we added in Adding a Package to an Account. Since we set the sub-account to invoice to the parent account we should see a new invoice generated under the parent account when the billing is completea single account and generate an invoice on the account when billing completes.
For additional details on the fields presented on this the Account Packages screen see the Billing the Account guide Account Packages Screen screen help.
Prerequisites
In order to bill the account you need to have at least one package in an active status added to the account. See Adding a Package to an Account.You must have a bill run configuredthe Account Package Example guide for instructions on adding a package to an account
Process
Log into your Logisense the LogiSense Billing application
In the search area box at the top of the page, set the “Search Filter” to “Account” leave the Search Filter set to Account and then enter the name of the sub-account we created in Creating a Sub-Account. Select it account you wish to bill. Select the account from the list and then click the arrow button to go to the accounts overview page.
Click on the “Profile” load the account's Overview page
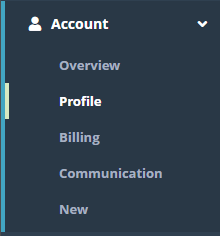
Under the Account menu, click on the Profile menu option
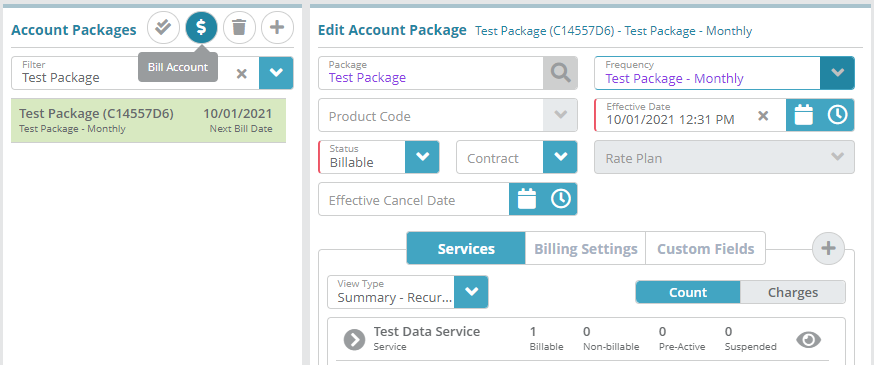
On the “Account Package” screen make Account Package screen add an account-package if one doesn’t already exist. Make note of the “Next Next Bill Date” Date and then click the “$”
 button to bill the account
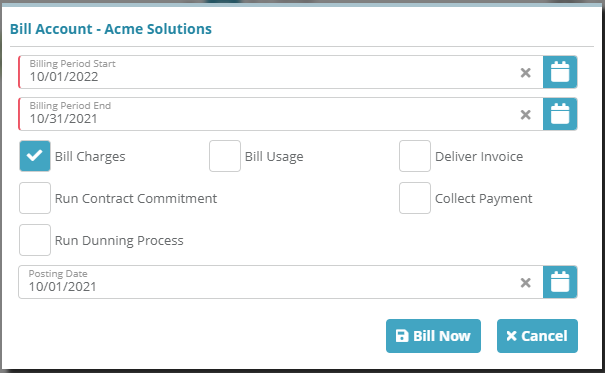
On the pop-up that appears specify the Bill Run configuration to use to bill this account. Select the “Schedule Now” option and then click the “Run” button. One thing to note here is that if your “Next Bill Date” on your package (see screenshot above) doesn’t fall within the “Billing Period Start” and “Billing Period End” dates on the “Bill Account” pop-screen you will have to modify those dates in the bill run configuration to fit the next bill day of your package.
You will see a pop up notice saying the bill run is scheduled to run in the top right of the page
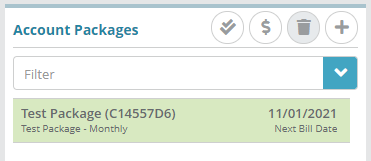
When billing is complete you’ll notice the “Next Bill Date” on the package move to the next month
To view the invoice created, go to the parent account by clicking the account name in the breadcrumb
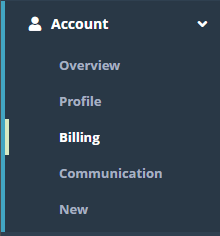
Then click the “Billing” menu
configure the billing options:
Set the Billing Period Start and Billing Period End dates to includes the account-package’s Next Bill Date (otherwise the account-package will not be billed)
Enable the Bill Charges option (billing will result in an invoice being generated, although not sent unless you also enable the ‘Deliver Invoice’ option)
Specify the Posting Date for this billing activity
Click the Bill Now button
A pop up notice should appear shortly stating that the bill run has been completed
Result
After the bill run completes the options configured in the bill run should take effect (bill packages, generate an invoice, etc.). To validate this:
Check the Next Bill Date on the package billed. It should be incremented to its next billing date (a month forward in this case for a monthly package)
Check to see if an invoice was created on the account by loading the Billing screen
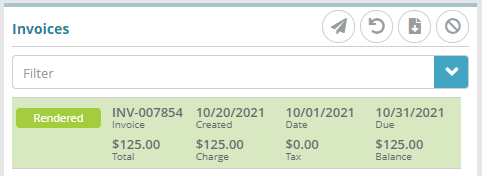
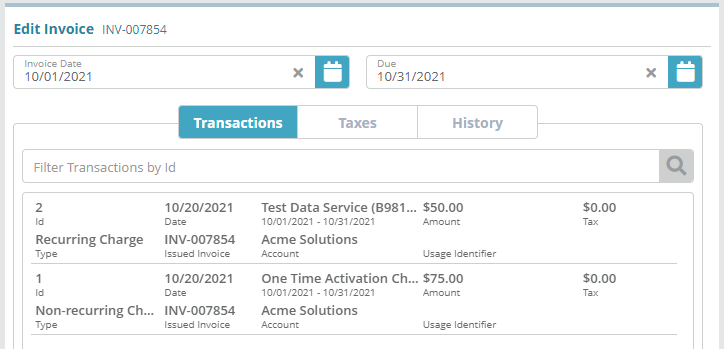
The first screen you’ll see is the “Invoices” Invoices screen where you will see your the newly created invoice. Click on it to bring up the list of transactions that were attached to the invoice from your bill run.
Next Steps
<<documentation team task: link to next configuration article>>
Related Guides
<<documentation team task: link to API guide which covers the same config process>>
...
invoice should be displayed
Selecting the invoice and clicking on the Transactions tab will give you a break down of charges applied related to the account-package billed. In the image below the one time activation charge ($75.00) and recurring service charge ($50.00) from the Test Package have been properly applied


