Summary
Account types are used to classify accounts (partner, enterprise, etc.). Account types are useful for reporting purposes, allowing you to filter data down to particular accounts (e.g. view revenue from corporate customers only). An account type is selected during account creation but it can be changed after the account has been created (on the Account > Overview > Settings > account screen).
Prerequisites
N/A
Process
1. Log into your Logisense Billing application
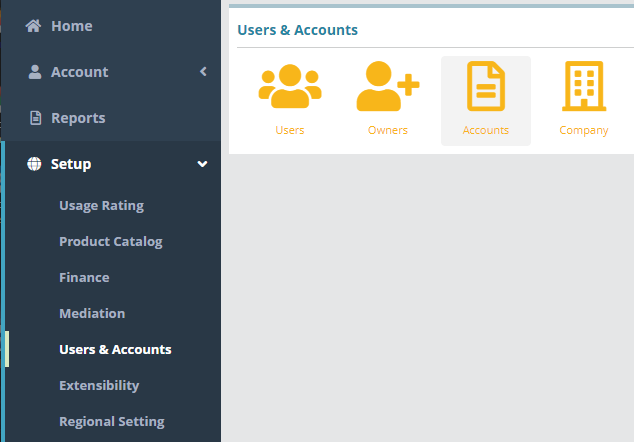
2. Click on the “Setup” menu then Users and Accounts. Then click on Accounts.
...
3. Under Accounts settings, Click on Account Types
...
The Account Types panel on the left of this screen allows you to select existing types to view and edit on the Edit Account Type panel to the right. Actions are also available in this panel which are shown as icons above the Filter text box.
Edit Account Type Panel
The information in this panel reflects the currently selected account type. From here you can change account type details (fields will display a red left border if a value is required and purple text if the field is read-only and cannot be modified).
Account Type Fields:
Name: a descriptive name for the account type (e.g. Enterprise)
Default: if set the account type will be selected by default when creating a new account
References tab
This section displays where the selected account type is used in the system. By default the reference data is displayed in a summary format to indicate where the account type is in use, however the Entity drop down field can be used to view the exact system objects that the account type is configured on.
...
The available actions are described below:
Add an Account Type
Under the Account Types heading on the left click the + icon
Under the Add Account Type heading on the right specify the account type details (see the edit account type panel section above for details on each field)
Click Save
Delete an Account Type
Under the Account Types heading on the left select the account type you wish to delete
Under the same Account Types heading click the delete icon.
On the confirmation dialog that appears select Yes.
Edit an Account Type
Under the Account Types heading on the left click the account type you wish to edit
Under the Edit Account Type heading on the right modify the account type details (see edit the account type panel section above for details on each field)
Click Save when you have finished making changes.
Next Steps
<<documentation team task: link to next configuration article>>
Related Guides
<<documentation team task: link to API guide which covers the same config process>>
<<documentation team task: link to Data Import guide which covers the same config process>>. This guide will demonstrate how to setup an Account Type called ‘Business’.
For additional details on the fields presented on the account type screen see the Account Types Screen screen help article.
Prerequisites
Account types can be setup immediately, there are no prerequisite configuration steps
Sample Configuration
Adding an Account Type
Log into the LogiSense Billing application
Click on the Setup menu, Users & Accounts and then Accounts
Under Accounts click on the Account Types tab in the upper right
Under the Account Types heading on the left click the
 icon to add a new account type
In the Add Account Type section enter a name for the account type. If you wish the account type to automatically be selected when creating a new account you can select the ‘Default’ option
Click Save to add the new account type
Result
When adding a new account the account type will be available in the ‘Type’ dropdown list. As shown below ‘Business’ is available in the list.
...
Next Steps
Once the desired account types are configured you can define the account statuses that you wish to permit. See the Account Status Types Configuration Example for an example of how to setup an account status type


