...
Log into your Logisense Billing application
Click on the “Setup” menu then “Users & Accounts”
…
Next Steps
...
Click on “Users”
Click on “Role Groups”
Click on the “+” icon to add a new role group
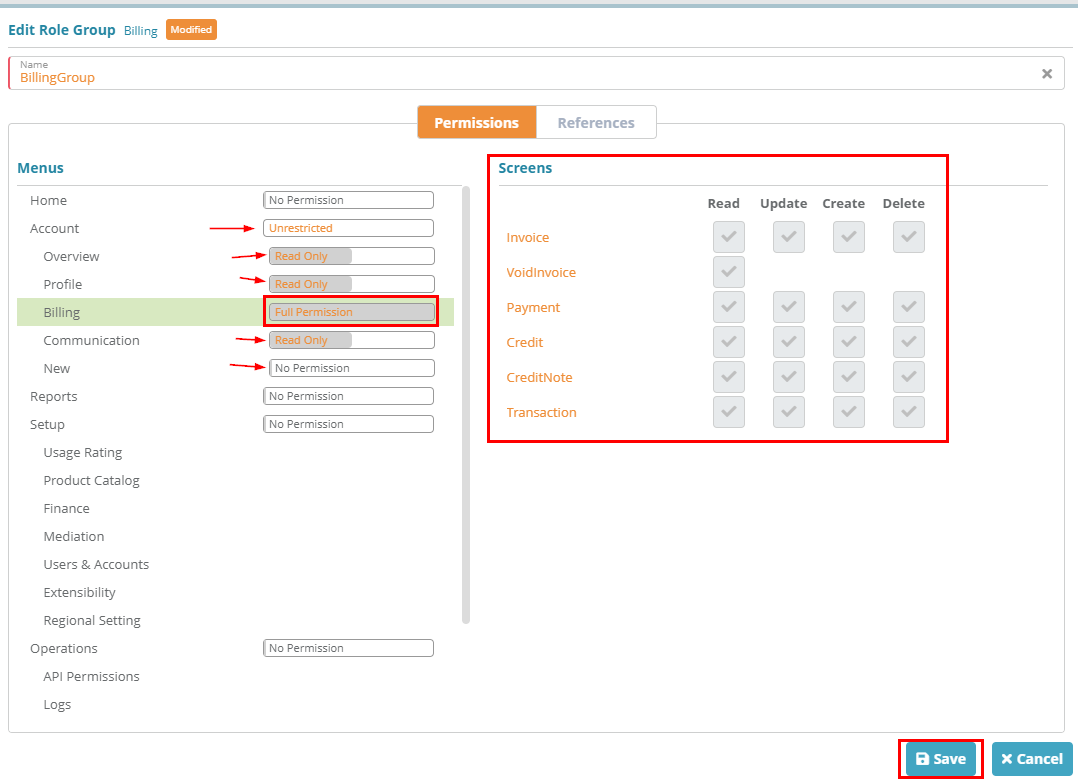
In this example we are going to create a “Billing” group that will only have access to the billing options for accounts. First enter “BillingGroup” as the name then:
click the "No Permission" beside Account until it shows as 'unrestricted'
next click "Full Permission" beside Overview until it changes to read only
do the same for the "Profile" and "communication" sub menus
click on "Full Permission" beside "New" until it changes to "No Permission"
click on "Billing" and leave as "Full Permission". Under the "Screens" section you can see that this user will have full access to all billing screens
click on “Save” to save the role group
Next Steps
<<Configuring roles >>
Related Guides
<<documentation team task: link to API guide which covers the same config process>>
...


